What Are Digital Stickers?
If you have ever used physical stickers to decorate a paper planner, digital stickers work the same way — except they live on your tablet or computer. Digital stickers are PNG image files with transparent backgrounds that you can drag, drop, resize, and rearrange inside note-taking apps. No scissors, no glue, no commitment. If you place a sticker and change your mind, you just move it or delete it. That alone makes them worth trying.
Digital stickers come in all styles — minimalist icons, watercolor florals, kawaii characters, functional labels like "important" or "due today," and decorative elements like washi tape strips. At Forjio Studio, our stickers feature Hachimi Mambo in various moods and situations, designed with a soft jelly-like texture that looks natural on digital planner pages. But the techniques in this guide work with any digital sticker set you own.
What You Need to Get Started
The setup is simpler than you might think. You do not need any design skills or special software. Here is what you need:
- A tablet with a stylus (iPad with Apple Pencil is the most popular, but Samsung Galaxy Tab with S Pen works great too)
- A note-taking app that supports image import (GoodNotes, Notability, Samsung Notes, Xodo, or similar)
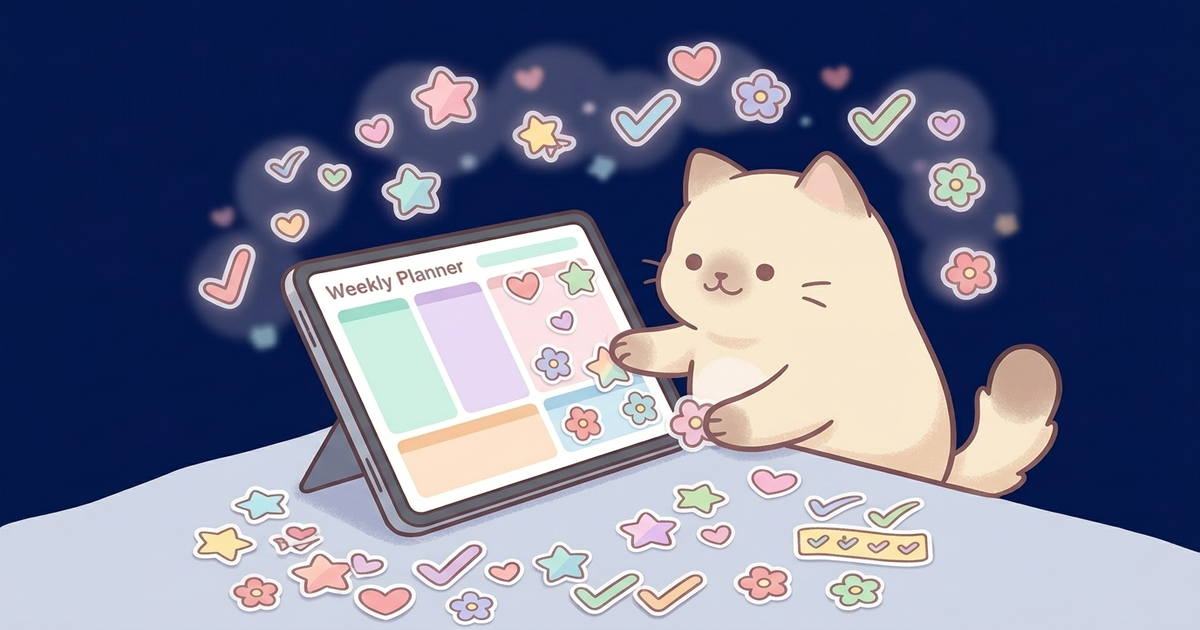
- A digital planner file — usually a hyperlinked PDF that you import into your app
- Digital sticker files — PNG images with transparent backgrounds, often sold as packs or bundles
Tip
You can also use digital stickers on a computer with apps like Xodo or PDF editors, but the experience is best on a tablet where you can drag stickers with your finger or stylus.
Step 1 — Import Your Stickers
Before you can use your stickers, you need to get them into your note-taking app. The exact steps depend on which app you use, but the general process is the same everywhere: download the sticker files, then import them into the app.
GoodNotes
GoodNotes has a built-in Elements feature that was designed specifically for stickers. Open GoodNotes, tap the Elements tool in the toolbar (it looks like a star), then tap the plus icon to add a new collection. You can import an entire folder of PNG stickers at once. Name your collection something descriptive like "Mambo Productivity" or "Kawaii Emotions" so you can find them quickly later. Once imported, your stickers live in the Elements panel and you can drag them onto any page with a single tap.
Notability
In Notability, tap the plus icon in the toolbar and select "Image" or "Photo." Navigate to where you saved your sticker files — usually the Files app or your Photos library. Select a sticker and it will appear on your page as a movable object. Notability does not have a dedicated sticker library like GoodNotes, so many users create a separate "Sticker Book" note where they keep all their stickers on one page and copy-paste from there as needed.
Samsung Notes
Samsung Notes makes it straightforward. Tap the attachment icon (the paperclip), choose "Image," and select your sticker PNG from your device storage. The sticker will appear as a floating object that you can resize and reposition. For a smoother workflow, save your sticker files in a dedicated folder on your tablet so they are easy to find every time you want to decorate a page.
Step 2 — Place and Arrange Your Stickers
Once your stickers are imported, the fun part begins. Here are some practical tips for placing stickers so your planner looks intentional rather than cluttered.
- Start with functional stickers first. Place your "to-do," "important," and "deadline" labels where they serve a real purpose. These are the stickers that make your planner useful, not just pretty.
- Add decorative stickers around the edges. Corner stickers, washi tape strips along the top or bottom, and small character stickers in empty spaces work well without covering your writing area.
- Resize deliberately. Most apps let you pinch to resize stickers. A common beginner mistake is making decorative stickers too large — keep them proportional to the page. Functional labels should be readable but not dominant.
- Layer thoughtfully. Place background elements (washi tape, frames) first, then add your foreground stickers on top. This creates depth and makes the page feel cohesive.
- Leave breathing room. The temptation is to fill every empty space, but white space is your friend. A few well-placed stickers look better than a page covered edge to edge.
Tip
Most apps let you lock stickers in place after positioning them. In GoodNotes, select the sticker and tap "Lock" so you do not accidentally move it while writing. This is especially helpful for background elements like washi tape.
Step 3 — Build a Sticker Organization System
Once you start collecting sticker packs, you will quickly end up with hundreds of individual stickers. Without a system, you will spend more time searching for the right sticker than actually planning. Here are three approaches that work well.
The Sticker Book Method
Create a dedicated notebook or note called "Sticker Book" in your app. Organize stickers by category — one page for productivity labels, one for emotions and moods, one for decorative elements, one for seasonal stickers. When you need a sticker, open your Sticker Book, select and copy the one you want, then switch back to your planner and paste it. This works in every app and is the most flexible approach.
The Elements Library (GoodNotes)
If you use GoodNotes, take full advantage of the built-in Elements tool. Create separate collections for each sticker pack or category. The Elements panel stays accessible from any notebook, so you never have to switch between documents. This is the fastest workflow for GoodNotes users and the main reason many digital planner enthusiasts prefer this app.
The Folder System (File Manager)
For apps without a built-in sticker library, organize your sticker PNGs in your device file manager. Create a main "Digital Stickers" folder with subfolders by theme, pack, or season. When you want to add a sticker, use the app's image import and navigate to the right folder. It takes a few extra taps compared to GoodNotes Elements, but it keeps everything tidy.
Common Mistakes to Avoid
We have seen a lot of digital planner setups over the years, and certain mistakes come up again and again. Avoiding these will save you time and keep your planner looking polished.
- Using JPEG stickers instead of PNG — JPEG files do not support transparency, so your stickers will have a white rectangle behind them instead of blending into the page. Always make sure your stickers are PNG files.
- Importing stickers at the wrong resolution — If your stickers look blurry or pixelated, they were probably saved at too low a resolution. Quality sticker packs are designed at 300 DPI or higher. Ours are optimized for tablet displays so they stay crisp at any size.
- Overcrowding the page — It is tempting to use every sticker in your collection, but restraint makes the difference between a planner that looks curated and one that looks chaotic. Pick three to five stickers per spread and let them breathe.
- Not backing up your sticker library — Digital files can disappear if your tablet resets or an app updates. Keep a copy of all your sticker packs in cloud storage (Google Drive, iCloud, or Dropbox) so you never lose your collection.
- Skipping the planner and stickering a blank page — Stickers shine when they complement a structured layout. A digital planner with pre-built grids, trackers, and sections gives your stickers context and purpose.
Sticker Ideas for Every Page
Not sure where to start? Here are some ways to use digital stickers on different planner pages:
- Weekly spread — Use day-of-the-week tabs, a "this week's goal" banner, and small mood stickers for each day
- Habit tracker — Mark completed habits with a checkmark sticker or a celebratory Mambo, and use a "streak" sticker for milestones
- Monthly overview — Add seasonal decorative stickers in the corners, highlight important dates with flag or star stickers
- Notes page — Use section divider stickers (washi tape strips) to separate topics, and "remember this" labels for key information
- Gratitude journal — Pair each entry with an emotion sticker that matches your mood — it creates a visual diary over time
Free vs Paid Stickers — What Is the Difference?
You will find plenty of free digital stickers online, and they are a great way to start. But there are real differences between free and premium sticker packs that become obvious once you start using them regularly.
Free stickers are often lower resolution, limited in variety, and may not have a consistent style across the set. Premium packs like ours are designed as cohesive collections — every sticker in a pack shares the same color palette, line weight, and art style, so your planner pages look unified rather than like a collage of random clip art. Premium packs also tend to include more functional stickers (labels, tabs, banners) alongside the decorative ones, giving you everything you need in one download.
Tip
If you are not sure whether digital stickers are for you, start with a free sample pack to test the workflow. Once you are comfortable importing and placing stickers, upgrading to a premium set will feel like a natural next step.
Making It a Habit
The real magic of digital stickers is not the stickers themselves — it is that they make you want to open your planner. A beautifully decorated spread feels inviting. You look forward to your weekly planning session because it is part productivity, part creative expression. That is why we design stickers that are not just cute but genuinely useful.
Start small. Pick one planner spread this week and add just a few stickers. See how it changes the way you feel about planning. Most people who try it once never go back to plain pages.
Ready to get started? Grab a sticker pack, open your planner, and start decorating. Mambo will be right there on every page, cheering you on — probably while napping.